
August 11, 2025
Introduction
A stepping stone pathway is one of the simplest yet most charming ways to add beauty and function to your outdoor space. Whether leading to your garden, patio, or a hidden seating area, these paths create a sense of flow, protect your lawn from wear, and give your landscape a unique personality. While you can always hire a professional like Frankie Garcia Landscape to create a flawless pathway, this DIY guide will walk you through how to design and build your own.
Why Choose a Stepping Stone Pathway?
Stepping stones aren’t just practical, they’re a design feature that blends seamlessly into a garden setting. Here’s why homeowners love them:
- Low Maintenance – No need for frequent repairs or replacements if installed correctly.
- Cost-Effective – Uses fewer materials than a fully paved path.
- Design Versatility – Works with rustic, modern, and natural landscapes.
- Protects Lawn & Soil – Reduces soil compaction and muddy spots from foot traffic.
- All-Weather Functionality – Keeps your feet dry and clean even after rain.
Materials and Tools You’ll Need
Before starting, gather all materials to avoid delays mid-project.
Materials:
- Stepping stones (natural stone, concrete pavers, or custom designs)
- Gravel or crushed stone (for drainage base)
- Sand or stone dust (for leveling)
- Landscape fabric (optional, for weed control)
- Ground cover plants or decorative gravel for gaps (optional)
Tools:
- Shovel or spade
- Wheelbarrow
- Level
- Rubber mallet
- Tape measure
- String and stakes or a garden hose (for layout)
- Tamper or hand compactor
- Gloves and safety glasses
Step-by-Step Instructions
Step 1: Plan Your Path
Decide where your pathway will go. Consider:
- Foot traffic flows between key areas like the patio, shed, or garden beds.
- Avoiding low-lying, water-prone areas unless proper drainage is added.
- Path width 24 to 36 inches is standard for comfortable walking.
Lay out your design using a garden hose or stakes and string. Test stone placement by walking along the path area, spacing stones at a natural stride (usually 3–6 inches apart).
Step 2: Mark and Prepare the Ground
Once you’re happy with the layout:
- Place each stepping stone where you want it.
- Use a spade to cut around the stone’s outline.
- Remove sod or soil to a depth of about 2–3 inches more than the stone’s thickness.
Tip: If your yard has a lot of weeds or grass, consider placing landscape fabric at the bottom of each hole before adding base materials.
Step 3: Create a Stable Base
A strong base keeps stones from shifting or sinking.
- Fill the hole with 2–3 inches of gravel or crushed stone.
- Compact it firmly using a hand tamper.
- Add 1–2 inches of sand or stone dust on top and level it.
This layered approach promotes drainage while keeping the stones stable.
Step 4: Place the Stones
Carefully set each stone in its prepared spot.
- Use a level to ensure the surface is even with surrounding ground (or slightly above for water runoff).
- Tap gently with a rubber mallet to settle it into place.
- Test stability by stepping on each stone if it wobbles, adjust the base.
Step 5: Fill the Gaps
Choose your gap filler based on style:
- Natural look: Fill with soil and plant low-growing groundcovers like creeping thyme or moss.
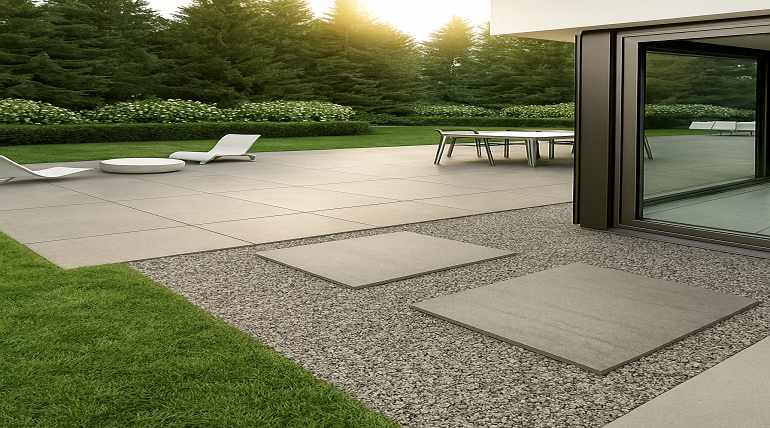
- Clean, modern look: Use decorative gravel, pebbles, or mulch.
- Rustic garden feel: Let grass grow between stones, trimming it regularly.
Step 6: Final Touches
Enhance your pathway with:
- Solar-powered garden lights for evening ambiance.
- Edging to define the path and keep filler in place.
- Decorative accents like planters, statues, or birdbaths nearby.
Maintenance Tips
A well-built stepping stone path requires little upkeep, but here’s how to keep it looking great:
- Refill sand or gravel between stones if it washes away.
- Pull weeds as they appear, or refresh groundcover plants.
- Re-level stones if they shift over time.
- Rinse stones occasionally to prevent moss buildup.
Creative Design Ideas
If you want your pathway to stand out:
- Mosaic Stepping Stones – Use broken tiles or glass pieces set in concrete for a colorful effect.
- Irregular Flagstone – Perfect for a natural, woodland vibe.
- Geometric Shapes – Square or hexagon stones for a modern aesthetic.
- Mix of Materials – Combine stone with reclaimed wood or brick for texture.
When to Hire a Professional
While this DIY is achievable for most homeowners, consider hiring experts like Frankie Garcia Landscape if:
- You need a large or curved pathway requiring precise cuts.
- Your yard has drainage challenges or uneven terrain.
- You want custom-designed stepping stones to match your home’s architecture.
Conclusion
A stepping stone pathway is more than a practical walkway; it’s an opportunity to express your style and invite exploration into your outdoor space. With the right materials, a thoughtful layout, and a bit of effort, you can create a path that blends beauty, durability, and function. And if you’d rather skip the shovel and let skilled hands do the work, Frankie Garcia Landscape is ready to bring your vision to life.